Another day, another set of revelations. We’ve almost reached our destination, so let’s get going!
Tooling Problems
SwiftUI and the cross-platform frameworks you will be using are either:
- A new thing with bugs and rough edges — and quickly evolving.
- An old thing with decades of legacy — and unlikely to change.
You will have to deal with both.
Previews, Oh Dear!
You won’t realize how much you depend on SwiftUI previews until you start working on macOS.
Sometimes they kinda work, but more often than not you’ll get an endless spinner. When they do work, they’re not interactive (you have to use the selectable mode with the arrow icon). There’s also a weird app that you can open outside of Xcode to preview, but it’s unreliable and weird.
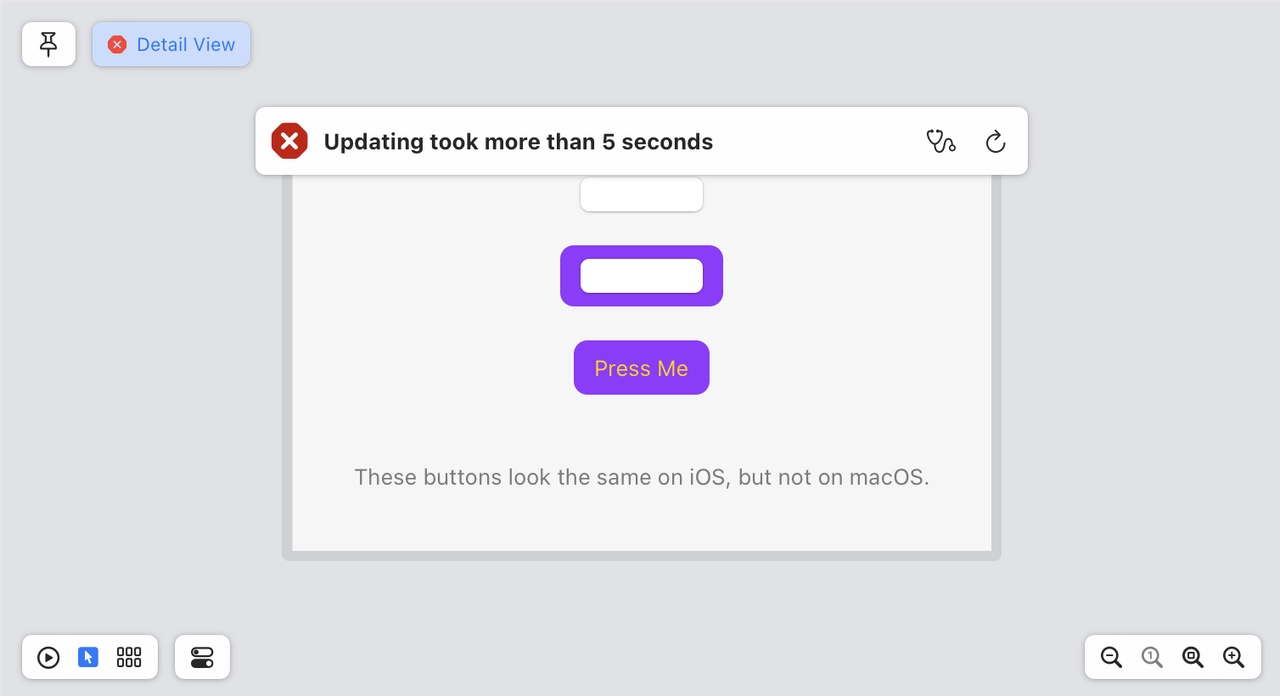
And when you do finally coax the previewer to work in Xcode, it never shows the button with a tint. That’s because whatever is showing that preview isn’t the key window, and windows that aren’t key don’t get tinted.
As a result, you’re going to run the app to see layout changes. Then you go back to Xcode to check the iOS layout and restart the previewer. Then after a few seconds you realize that’s not going to work because the target is still on the Mac. So you switch the target to iOS and check things out after restarting the previewer (again). Then the Mac code gets edited and you run to check the changes: and quickly realize that the iOS Simulator is kicking off because the target is set wrong. Lather, rinse, and repeat.
I’m not exaggerating, when I say THIS HAPPENS HUNDREDS OF TIMES EVERY DAY.
To adding insult to injury: if you’re using .navigationBarTitleDisplayMode() in your PreviewProvider, you’ll have to add #if os(iOS) because that API doesn’t exist on the Mac.
And you can bet your ass I’ve filed feedback about all of this. You will, too. (FB12071275)
Feeling Entitled?
Pay attention here: I’m about to save you a bunch of time. Many apps use entitlements for App Groups and Push Notifications and have key/value pairs in the project’s .entitlements file.
The keys for these things are different on macOS.
When you created the Push Notification capability for your iOS app, you added an “aps-environment” key with a “production” value. When you added the Mac as a Destination for your SwiftUI target, your entitlements were not modified.
You will first wonder why the UNUserNotificationCenterDelegate methods are either generating an error or not being called at all. Then you will search for documentation and find that “com.apple.developer.aps-environment” is needed. You check the entitlements and see “aps-environment”. Looks good!
The similarity of the key names makes this a hard lesson to learn. I looked at “aps-environment” and “com.apple.developer.aps-environment” for hours before I realized they were different. After you add the one for macOS manually, everything is golden.
After that trauma, you’ll see that group containers aren’t working quite right. You’re now a seasoned veteran and quickly determine that’s because iOS and macOS have different configuration requirements (macOS needs a TeamIdentifierPrefix, other platforms do not).
That’s a trickier one to fix manually: a target can only have one app group in its entitlements. You have to split the target and do a bunch of configuration changes in Xcode. Never fun.
Since we primarily used the group container to transfer information from a NotificationServiceExtension and its containing app, we were able to get by without this capability on the Mac. It was easiest to add an #if os() check at the points where the group was being used. For example, using UserDefaults.standard instead of UserDefaults(suiteName:) in our Preferences class.
And More…
In the grand scheme of things, these are minor irritations. Worth mentioning, but not worth worrying about:
- We weren’t able to get
FileRepresentationworking in aTransferable. Other applications can’t access a temporary file that’s created for the export. This feels like a sandbox problem that we couldn’t work around. I use a great app called Shareful that makes the share menu a lot more useful, but it needs access to the exported files. - Pushing a view onto a
NavigationStackfeels like it should be animated, but it’s not. You can get very close with eitherNavigationStack(path: $path.animation())orwithAnimation { path.append(item) }, but there’s no way to animate the back button in the toolbar. Feedback submitted (FB12071343). - You can’t put an
EnvironmentObjecton aWindow. OurScenebody usesWindowGroup(iOS) andWindow(macOS) and it feels like that would be a better place to put sharedStateObjectsinstead of the views embedded in each window. - When your SwiftUI macOS app goes into the background, Instruments will show a mysterious spike in CPU usage with
NSPersistentUIFileManager(Snapshot)writeWindowSnapshot. This snapshot is used when macOS reboots and shows the window contents while re-establishing the desktop state.
TestFlight
Beggars can’t be choosers. I’m old enough to remember a time when there was no TestFlight on the Mac: all the way back in 2021.
Testing an app that exists on both iOS and macOS can, and will, confuse your testers. It will also confuse you because it behaves differently than what you’re used to on iOS.
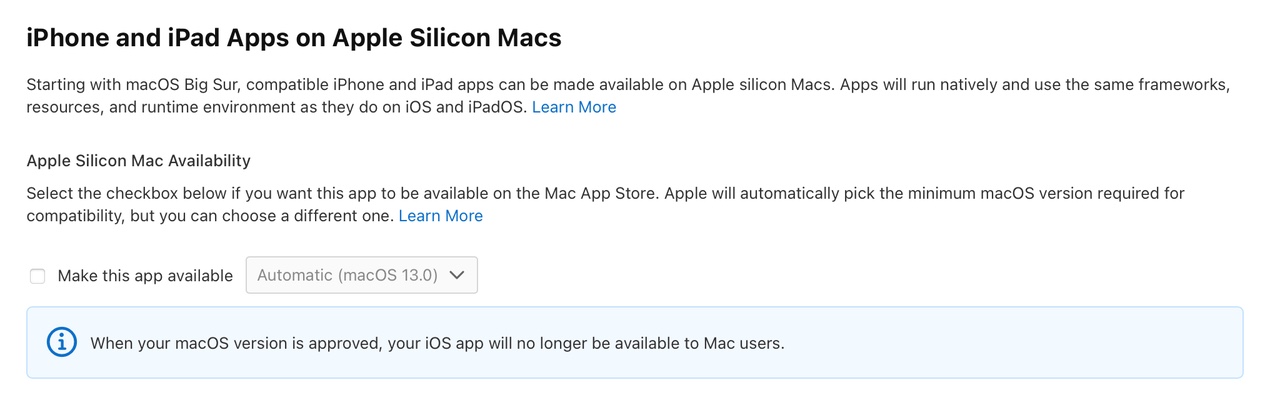
The first thing you want to do is turn off the ability to run your iOS app on Apple Silicon. As you can see above, it won’t matter for the App Store, but it will cause installation problems for your testers. That’s a good thing because it gives you a chance to remind folks that they need to install the macOS app.
More TestFlight fun that awaits:
- Beta reviews take much longer than they do on iOS (days versus hours). TestFlight on macOS also gets confused if you replace a build with a newer one (because it’s taking so long and you have new things you want people to test). Be patient. If you’re not, you’ll see a “This beta isn’t accepting any new testers right now” and will have to submit a new build to set things right.
- TestFlight users can only be added after macOS build is approved. You can do it before that and you’ll end up with a bunch of folks who will try to install the iOS version on Apple Silicon even though it’s not available. Confusing, both for the tester and you.
- TestFlight users will see both macOS and iOS versions even if they can’t install the iOS version. And the only way to pick the right one is with a low-contrast segmented control at the top of the window. The default setting is also iOS. Dumb.
- TestFlight beta review for incremental builds on iOS is instantaneous these days. You can expect something slower on macOS: it’s not only the initial review that’s slow.
Still, this is better than testing with manual provisioning or Developer ID and Sparkle. Baby steps!
The good news is that after you’ve run the TestFlight gauntlet, there’s only one thing left to do: press that “Submit for Review” button. Congratulations! 🎉
Documentation
As I look back on the challenges during this project, the biggest source of friction was Apple’s SwiftUI documentation. While they have done a fantastic job at getting folks started, things start to fall apart when you’re in the thick of things.
To give you an idea of what I mean, we didn’t learn about fileExporter until late in the project. Part of the problem is the naming: I’m thinking “save a file with dialog/panel” and “save”, “dialog”, “panel” are not mentioned at all on the page. Technically, this is correct:
Presents a system interface for allowing the user to export an in-memory document to a file on disk.
But it’s far too abstract for someone who’s just trying to solve a problem. I can understand this approach with the wording: it needs to work in a variety of platform-specific scenarios. But it’s impossible to target with a query.
So a developer heads to their favorite search engine and enters “save dialog swiftui”. You get back a bunch of hits and they all talk about NSSavePanel.
The current Developer Documentation is teaching folks that it’s only useful when you need specific information about an API. And even then, when you search for “frame(” you get ten identical results all telling you that the API is deprecated. I’m pretty sure it’s not.
Clearly the current search approach isn’t working. So what does work?
Hacking with Swift, Swift with Majid, Sarunw, SwiftLee, Clarko, and many other sites* that explain APIs in the context of solving a specific problem.
(* If you’ve blogged about Swift or SwiftUI in the past you have my sincere thanks. The sites mentioned here just happened to show up first in my Safari history.)
SwiftUI has freed us from having to know implementation details: when I first used fileExporter, I note that it picked up my accent color automatically on both platforms. That’s great, and I don’t need to know any details.
But I do need to know that I need a sandbox entitlement on macOS. I want to know the configuration options available (only a default file name, bummer). How do I create the a FileDocument for the API? And for an iOS developer who’s never seen a FileWrapper, what the heck is that?
It seems that in a world of SwiftUI, Developer Documentation would work better if it focused on the recipes rather than how the ingredients are made. Feedback submitted (FB12071380).
Conclusion
There has been a lot to take in over the past three days. It’s taken me a week to produce and will take you longer to consume.
Getting your app from iOS to macOS is a task with many steps. Start the journey with the hard stuff that’s going to turn out to be easy, and then chip away at the easy stuff that’s harder than you expected. Come back to this guide as you work through it all.
You’ll get into the swing of things and before you know it, you’ll have a great app with surprisingly little effort. It’s easy to forget how much time you saved with all those hard things that just worked. Hopefully we helped you get through the easy things. 😀
Good luck!