It’s day two of our epic journey from iOS to macOS. Let’s get started with everyone’s favorite topic.
Ugly Code
In every app, there’s code you hate writing, but do it anyway. Shipping is better than perfection!
Here are our less-than-proud moments in Wallaroo for the Mac:
Handling URLs
SwiftUI’s default mechanism for handling URLs on macOS isn’t great. If you’ve used .onOpenURL on a View to handle external events, you’ll be disappointed to learn that a URL scheme on macOS opens a new window (Scene) before it hands the URL to the view modifier. And if you’re using a single Window instead of a WindowGroup, nothing happens at all.
This makes things like OAuth callbacks, deep navigation links, or a Shortcuts x-callback-url difficult. Wallaroo uses all of these techniques.
The workaround here is to create an AppDelegate and pass it to the NSApplicationDelegateAdaptor. In the delegate, you can grab the URLs before SwiftUI gets them and handle them as needed in other parts of your application. We passed the URL in a custom notification posted to the NotificationCenter. The views that need to handle it used .onReceive to get the information from the publisher. Very un-SwiftUI-ish, but it worked well.
Pop that NavigationStack
We want to make Wallaroo as keyboard friendly as possible (we’re still working on it, in fact).
One thing we wanted to do was use the Escape key to pop the NavigationStack. On the Mac, it’s a key that has always represented “go back” and many apps (like Photos) take advantage of that. Unfortunately, to accomplish that in Wallaroo, we had to use an invisible ToolbarItem with a .keyboardShortcut(.escape, modifiers: []).
It’s not possible to use a CommandMenu either: again, this key has a special history on the macOS responder chain.
And More…
Here are a bunch of other small things that no one should feel proud of:
- We ended up not using a separate Settings window, but using
NSApp.sendAction(Selector(("showSettingsWindow:")), to: nil, from: nil)to open it would have made my fingers hurt. It would also be an unpleasant surprise if someone decided to change the selector name back to"showPreferencesWindow:"😳 - Hiding “Show Tab Bar” isn’t a
CommandGroupPlacementlike you think it would be. Instead it’sNSWindow.allowsAutomaticWindowTabbingand is best done in theNSApplicationDelegate. Thankfully, this has been addressed when you use a singleWindowin the latest macOS beta, so you don’t need to go into AppKit power user territory. ToolbarItemwith aMenuthat uses.menuIndicator(.hidden)andLabelwith.labelStyle(.iconOnly)does not center the image in the border and there’s no way to fix it. It eventually lays out correctly after pushing/popping theNavigationStack. Every one of our designers reminded me that this control wasn’t aligned correctly and we eventually moved it to a Category menu in the menu bar.ProgressViewin a toolbar is ginormous and needs.scaleEffectto halve its size.TabViewcontrols can’t be hidden and replaced with custom controls. The only choice is.automatic, so we hid the view under the top toolbar — thank goodness for blur that hides it. On iOS we use.page(indexDisplayMode: .never)to get rid of it completely. Feedback submitted (FB12071194).- While you’re struggling with window and sidebar size constraints, you end up with
UserDefaultsfor frames that have “fun” keys like"NSWindow Frame SwiftUI.(unknown context at $1acd3d768).SceneBridgeReader, SwiftUI.ModifiedContent>, SwiftUI._PreferenceWritingModifierSwiftUI.PreferredColorSchemeKey>, SwiftUI._EnvironmentKeyWritingModifier>>>>-1-AppWindow-1". Frequent use of “defaults delete com.whatever.app” is needed (cherry picking the frame keys would be a challenge!)
Non-Obvious Things
Every project has surprises. These are them.
Help Needs Help
The default for the .help CommandGroup uses Help Books — a technology that is only used by Apple. I’d be willing to bet that no iOS developer has even heard of it (much less had to implement). The documentation, which was last updated in 2013, just screams modern.
It’s also why you see “Help isn’t available for …” in so many Mac apps.
A more forward thinking approach would be to include a “support URL” key in an Info.plist that provides a link to a developer’s website. It could potentially be useful on iOS, as well. Everything about SwiftUI is forward thinking — a link seems like a much better default behavior. Feedback submitted (FB12071205).
In Wallaroo, we replaced the default implementation with a couple of Buttons that use openURL in their action. We’ve included it in the sample app.
And More…
These two bullet points will probably save you hours of wondering what the hell is going on:
- On macOS, there is no support for @3x image assets. There are no @3x screens, so you must include at least a @2x version. For iOS developers who are using @3x and having them scale down at runtime, this is a head scratcher.
- iOS uses a case-sensitive file system and macOS does not (by default).
Image("Border")andImage("border")won’t necessarily produce the same result. This is not a fun discovery.
Mac-assness
Being Mac-assed is something to strive for: here are some things that will help you achieve the fit & finish that customers on macOS want.
Open and Save
You’ll want to familiarize yourself with opening and saving files on macOS.
Using Transferable to get information into the sharing APIs works fine, but it doesn’t have the breadth that you’re used to on iOS. For example, there is no “Save Image” or “Save to Files” action supplied by the system.
Mac customers are also going to look for File > Save or ⌘S before even thinking about a sharing icon.
When it comes to the implementation, you have a choice between SwiftUI’s fileExporter and fileImporter and AppKit’s NSSavePanel and NSOpenPanel. It’s a complex choice depending on the needs of your app, so take a look at the comments in the sample code to help you make a decision.
We went with AppKit, but I wish we could have gone with SwiftUI. Feedback submitted (FB12071234).
Playing In a Sandbox
If you’re planning on saving files on macOS, remember that you need an App Sandbox entitlement. Take a trip over to your target’s Signing & Capabilities > App Sandbox > File Access > User Selected File and make sure it’s set to “Read/Write”. Your app will crash if you don’t.
While you’re there, take a look at the other things you might need. A common one is Outgoing Connections (Client). Without it, you’ll wonder why you can’t download any data from your server — and probably spend a fair amount of time thinking it has something to do with App Transport Security. Don’t be like me.
Additionally, some things, like the Camera, need a sandbox entitlement in addition to the usage description you’re familiar with on iOS.
Use the Keyboard, Luke
The Mac has always had a keyboard and your customers on the platform know how to use it. Maybe even in ways you don’t know about. I’m an expert.
Keyboard shortcuts are easy to add: all you need is a .keyboardShortcut on a View. The harder part is to determine what keys to support. Some common ones are:
.return– This, combined with a.buttonStyle(.borderedProminent), will perform the default action in a view when the customer presses the Return or Enter keys (see below)..pageUp&.pageDown– Used to page through a list of information..home&.end– Like the paging keys, but goes to the beginning or end of the list..upArrow,.downArrow,.leftArrow,.rightArrow– Used to navigate through a grid or for positioning elements.
KeyEquivalent shows all of the possibilities. Be aware that the default for modifiers on the keyboard shortcuts is .command: for the single keys listed above, you’ll want to pass an empty set.
Sometimes SwiftUI does this work for you. An example is a List with a .listStyle(.sidebar). When the sidebar has focus, you can use the arrow keys or type letters to change the selection.
Button Acclaim
After my previous treatise on the differences between buttons on iOS and macOS, you might think I have a grudge against the HIG. I don’t.
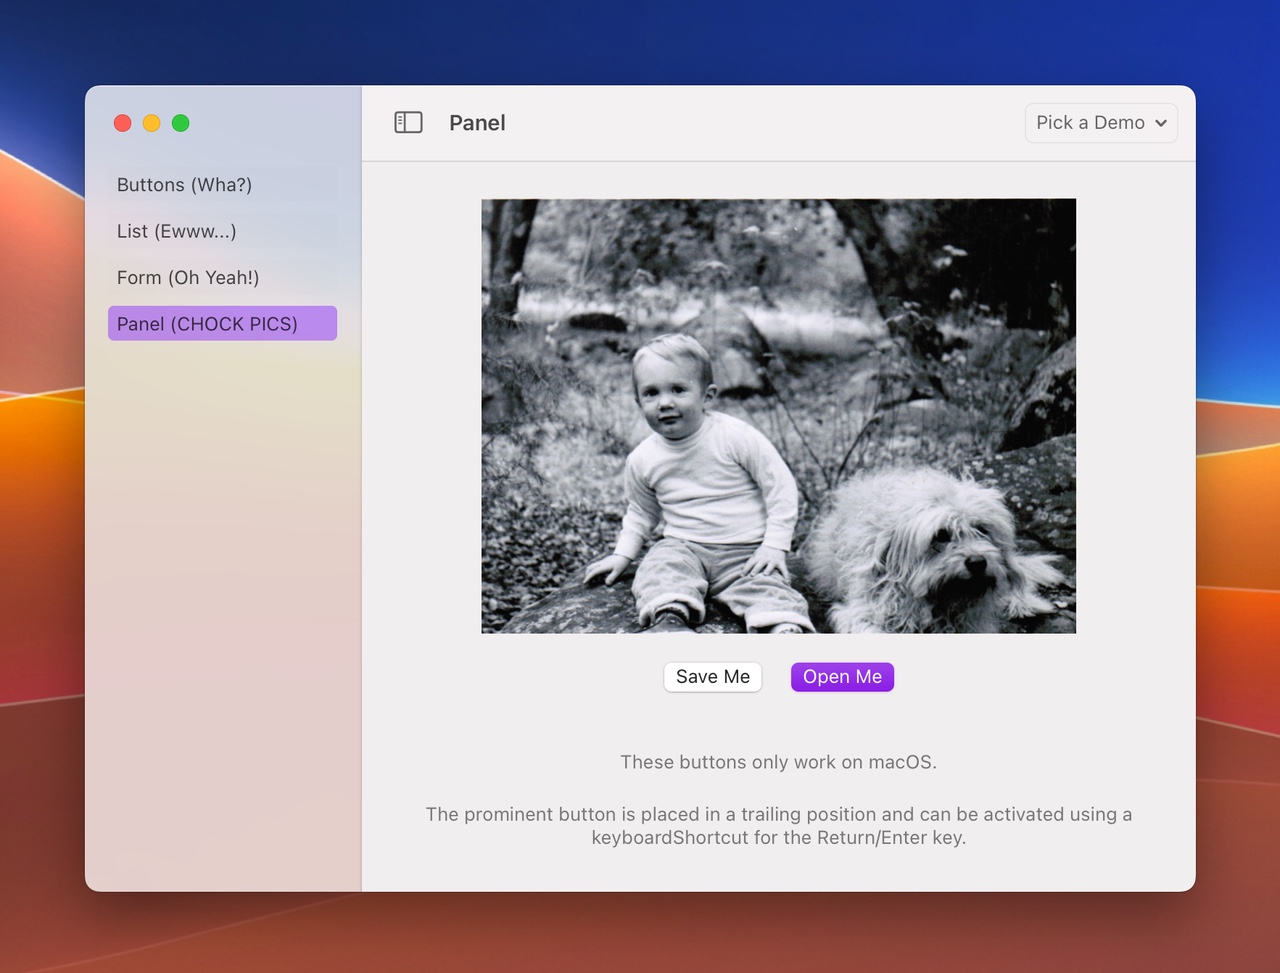
On the Mac, prominent buttons are used to highlight a primary action. If you’ve ever used the Return key to open the selected file in a dialog, you know how this works.
Don’t use prominent buttons because they look pretty or stand out. Use them as a cue and make sure they’re hooked up to the Return key so the action is easy to perform (see above).
And just as you only have one Return key on your keyboard, you should only have one prominent button in your View:
Bitmap Image What?
NSImage has over 30 years of legacy. UIImage does not.
You will learn this quickly the first time you try to save a JPEG and wonder what the heck an NSBitmapImageRep is all about. For those of us old enough to remember, NeXTSTEP images could be represented as snippets of Display PostScript (sort of like NSEPSImageRep) or as TIFF files with multiple subfiles (.tiffRepresentation). Hence .representations.
(For a good time, take a look at the documentation for NSPICTImageRep. I barely know what any of those words mean.)
You’ll find common ground in CGImage, which works perfectly across platforms and is supported by both NSImage and UIImage. And as you use these APIs, remember that you’re working with pixels instead of points.
And More…
The sample project includes a bunch of these things:
NSSound.beep()is your friend. It’s a good way to let someone know that an action didn’t go as planned. ThePanelViewdemo uses it when a file can’t be created.- Add an “App Category” (
LSApplicationCategoryType) to yourInfo.plist— you don’t need it on iOS, but you can’t submit to the Mac App Store without it. - Add copyright information to your
Info.plist. The key is “Copyright (human-readable)” (NSHumanReadableCopyright) and it’s used in the About box and Finder’s Get Info. This should be a part of the standard project template, especially since it’s something unfamiliar to iOS developers. Feedback submitted (FB12071253). - Mac apps have traditionally shown credits as a part of the standard About box. Add a
Credits.rtffile to your app’s resources and you’re done. - Good news! The
ITSAppUsesNonExemptEncryptionyou use in your iOSInfo.plistalso works on Mac builds to avoid the compliance step after you upload a build. - Make sure you turn on scroll bars while testing your layouts. Use System Settings > Appearance > Show scroll bars: Always. These scroll bars are much more prominent than on iOS and will affect view placement in many unexpected places. Don’t assume that everyone has a trackpad and uses one of the other scroll bar settings.
- Turn on Accessibility Shortcuts and use them to test reduced transparency, increased contrast, inverted colors, etc. You can find them in System Settings > Control Center > Accessibility Shortcuts > Show in Menu Bar: On. (Not in Accessibility settings – surprise surprise!)
- The macOS icon still needs individual sizes and should include transparency (unlike on iOS). It’s likely you’re relying on iOS to mask out the corners — you have to do it yourself on the Mac. Look at
AppIconin the sample project’s asset catalog to see what you need.
Keep It Up!
Another long trek today, so congratulations for making it to the end. We’ll wrap things up tomorrow in Part 3. See you then!